How to Make Your Signature Transparent (Remove the Background From a Signature)
Photograph or scan your signature, remove the white background, and save a transparent PNG for PDFs, Word and Google Docs files, forms, and invoices.

A transparent signature is an image of your handwritten signature with the paper removed, so only the ink is left. You can place it on a PDF, a Word or Google Docs file, an invoice, or a form without a white box covering the lines underneath. Whether you are signing an offer letter, a rental agreement, or a college or bank form you have to return as a PDF, it saves you from printing, signing, and scanning every time.
Here is how to capture your signature, remove the background with a signature background remover, and insert the result into common apps.
Step 1: Capture your signature well
A clean source image matters most. Thin strokes are easy to lose in a dark, blurry, or shadowy photo.
- Use plain white paper. Ruled or textured paper can be read as part of the signature.
- Sign with a dark pen. Black or dark blue ink gives the strongest contrast. Pencil and faint ballpoint are much harder to separate.
- Sign a little larger than usual. Bigger strokes keep more detail; you can scale the image down later.
- Use even light. Window daylight works well. Avoid the flash, which causes glare.
- Keep shadows off the page. Your phone and hand easily cast one. Adjust the light or angle until the paper looks evenly white.
- Shoot straight on. Hold the phone parallel to the paper, directly above the signature, so the strokes are not distorted. A flatbed scanner at 300 DPI or more works even better.
Take two or three photos and keep the sharpest one.
Step 2: Remove the background in one click
The quickest way to remove the background from a signature is an automatic tool. PerfectifyAI's Background Remover detects the subject and returns it on a transparent background, with no manual selection.
- Open the PerfectifyAI Background Remover.
- Upload your signature photo or scan as a JPG, PNG, or WebP file.
- Confirm that Background Remover is selected, then choose Run.
- Enter the email address where you want the download notification and complete the human-verification step.
- Open the download link and save the transparent PNG.
Check the result before you use it (see the tips below). If a fine stroke is missing or a speck of paper remains, you can retake the photo or touch it up manually.
Before and after example
The first image shows a signature photographed on paper. The second shows the same signature after background removal, saved as a transparent PNG with only the ink left.
Before: the signature photographed on paper.
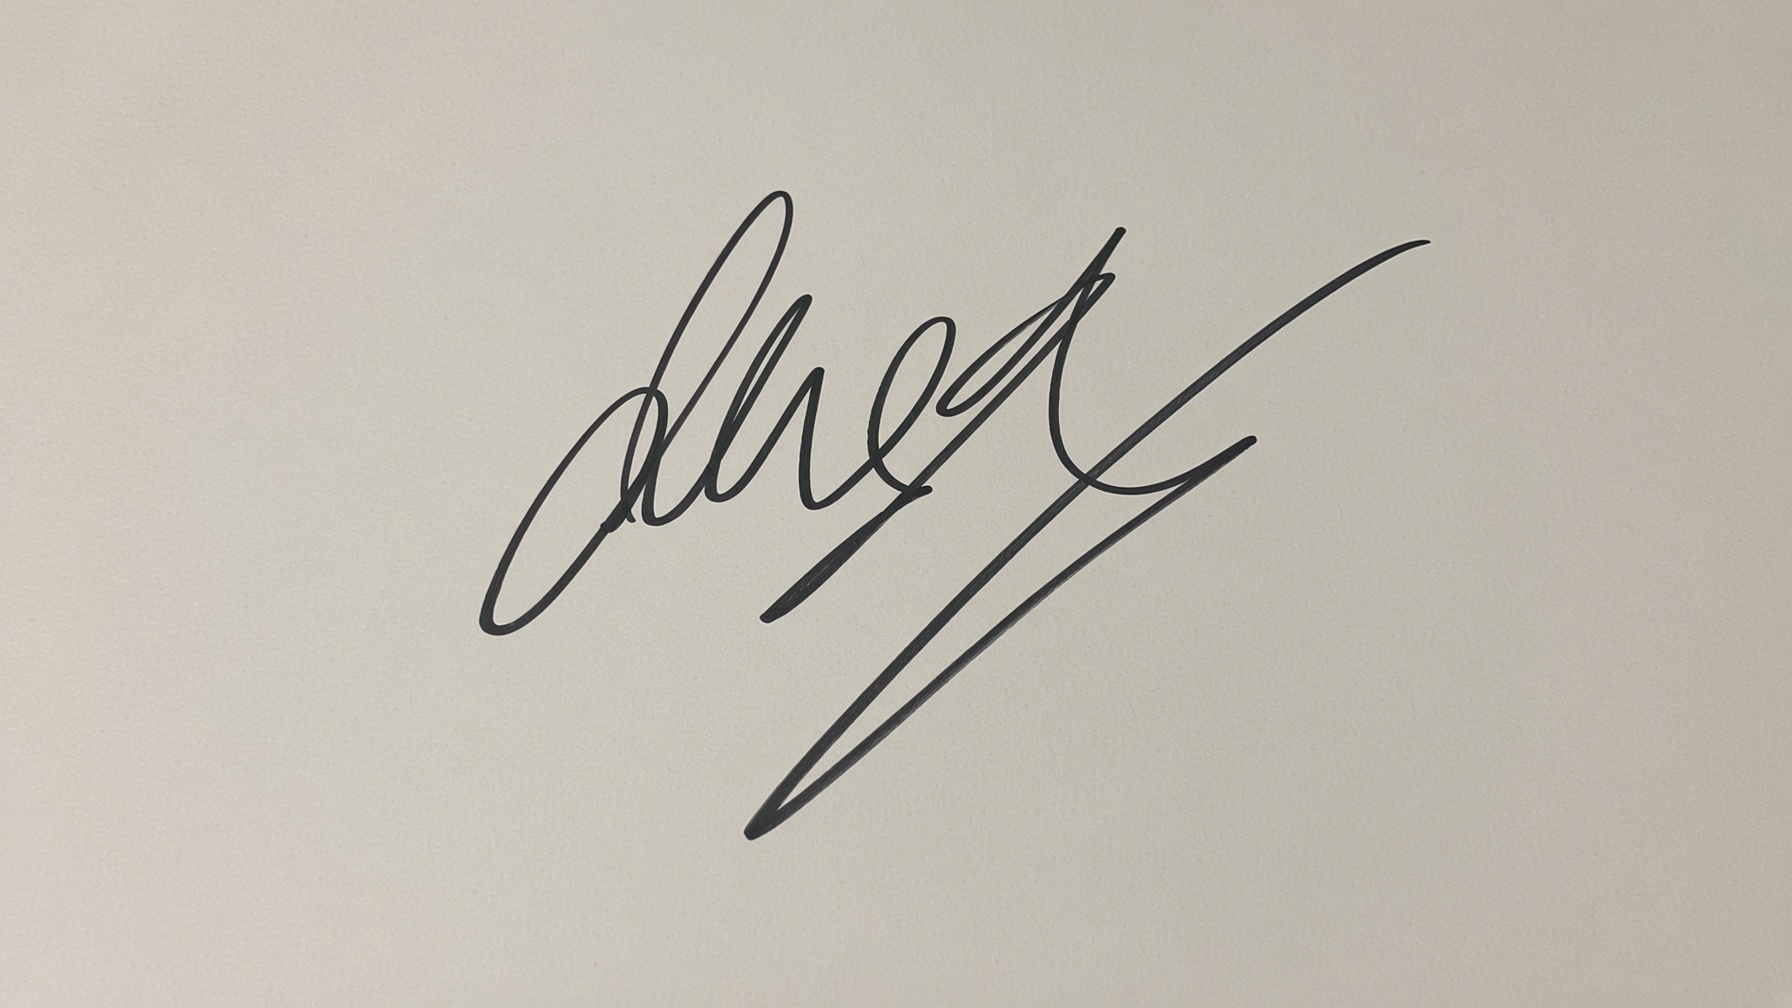
After: the same signature on a transparent background.

Tips for clean, thin strokes
Signatures are tricky because the lines are thin and the gaps are large. These habits help:
- Use a higher-resolution photo. Use the full-resolution photo, not a screenshot or a compressed chat image. More pixels per stroke means smoother edges.
- Crop tight before uploading. Leave only a small margin around the signature, so stray marks such as the page edge or your desk are gone.
- Do not over-sharpen or add filters. Heavy contrast or "document" filters can break thin lines into dotted segments.
- Check the edges on dark and light backgrounds. Open the PNG on top of a white page and then a dark page. A pale fringe or leftover paper texture that is invisible on white often shows up on black.
- Zoom in on loops and joins. Look closely at the thinnest parts, such as the tail of the last letter and any dots or underlines.
How to insert a transparent signature
Once you have the PNG, keep it somewhere safe and insert it wherever you need it. Menu names can vary slightly between versions.
Microsoft Word
- Click where you want the signature, then choose Insert > Pictures > This Device and select the PNG.
- With the image selected, choose Layout Options (or Picture Format > Wrap Text) and pick In Front of Text so you can drag it onto the signature line.
- Resize it from a corner handle to keep the proportions.
Google Docs
- Choose Insert > Image > Upload from computer and select the PNG.
- Click the image, then choose In front of text in the toolbar that appears under it.
- Drag it into position and resize from a corner.
A PDF editor
Most PDF editors can place an image on a page. In Adobe Acrobat, open the PDF, choose Edit a PDF (or Edit PDF), then Image (or Add Image), select the PNG, and click where it should go. Acrobat's Fill & Sign tool can also save an image as your signature for reuse. Other editors usually offer a similar Insert image option. Save the signed file as a new copy, and keep the unsigned original.
E-sign tools and invoices
Many e-signature and invoicing apps let you upload a signature image instead of drawing one. Look for an Upload or Image option in the signature settings.
The manual alternative: Photoshop or GIMP
If you prefer to do it yourself, Photoshop and GIMP can both remove a plain white background. Signatures usually suit a colour-based selection (Photoshop's Magic Wand or Select > Color Range, GIMP's Fuzzy Select or Select by Color) because the paper is one flat colour. Our step-by-step guide on how to remove a background in Photoshop and GIMP covers adding transparency, selecting, refining edges, and exporting a PNG.
Whichever method you use, save the result as a PNG. JPG cannot store transparency, so the paper turns back into a white rectangle. For more on formats and alpha channels, see how to make an image transparent.
A note on safety and legal use
- Use only your own signature. Never create or use a signature image for someone else without their clear permission. Using another person's signature can be forgery.
- An image is not a certified digital signature. A pasted signature image is a picture on the page. It is different from a certificate-based digital signature that verifies who signed and shows whether the document was changed later. Some documents, such as certain government, tax, or legal filings, may require a specific type of signature, so check what the recipient accepts.
- Keep the file private. Store the PNG securely, never post it publicly, and share only the signed documents that need it.
Frequently asked questions
Can I make my signature transparent on my phone?
Yes. Photograph your signature, then upload it to the PerfectifyAI Background Remover from your mobile browser and download the transparent PNG.
Why does my signature still have a white box around it?
The file was probably saved or exported as JPG, which cannot store transparency. Make sure you use the PNG file. If the PNG itself shows a box, the background was not fully removed; retake the photo with brighter, more even light and try again.
Should I save my signature as PNG or JPG?
PNG. It keeps the transparent background, so only the ink shows on the document. JPG fills the background with white.
Is a transparent signature image legally valid?
It depends on the document, the recipient, and local law. Signature images are common on everyday forms and invoices, but an image is not a certified digital signature. When a specific type of signature is required, use the method the recipient asks for.
Why are parts of my signature missing after removing the background?
Very thin or light strokes can be mistaken for background. Sign with a darker pen, photograph it at higher resolution in even light, crop tight, and run it again.
Make your signature transparent
Sign on plain white paper with a dark pen, take a sharp, straight-on photo in even light, and remove the background. Try the PerfectifyAI Background Remover to get a transparent PNG in one click, check the edges on light and dark backgrounds, and keep the file private.