How to Remove Text From an Image You Own
Learn how to remove unwanted text from an image you own, choose an AI or manual method, and check the edited area before using the result.
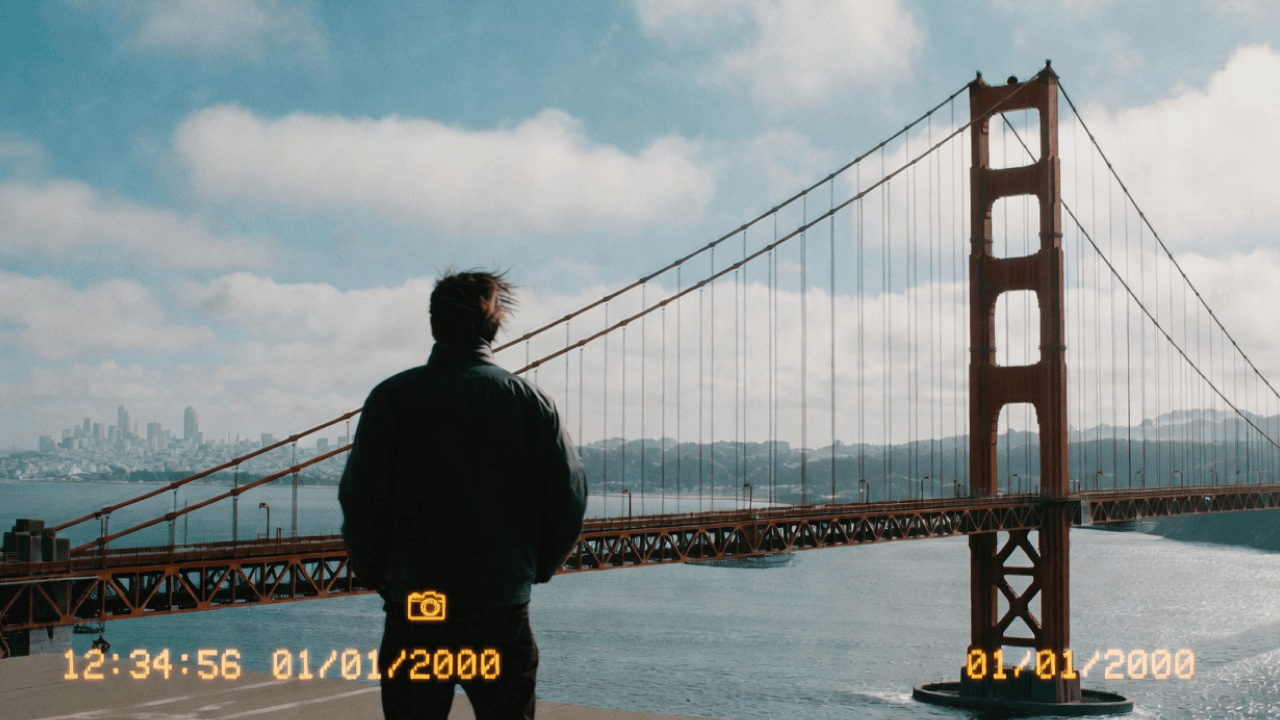
To remove text from an image, first look for the clean original or an editable file with the text on its own layer. If neither is available, work on a copy: crop an overlay near the edge, try an AI text-removal tool, or retouch the area manually. Compare the result with the original before you use it, especially where letters covered important details.
These steps are for images you own or have permission to edit. Removing text does not grant rights to someone else's image.
Check what the text is before removing it
An added caption, date stamp, or promotional message may sit on top of the image as a separate layer. If you still have that project, hide or delete the layer and export again. The image beneath it stays intact.
Text photographed as part of a scene is different. A shop sign, book cover, product label, or document is part of the source image. Erasing it requires inventing or copying replacement detail, and may change what the image means. Keep required product information, rights notices, and records intact. If the text is a watermark, see our guide to watermark removal and permissions.
Choose a method that fits the image
Re-export without the text layer
Use the original design file whenever possible. Look in your camera roll, cloud backup, design project, or earlier exports for a clean version. This is the most reliable way to remove an added text overlay without damaging the background because nothing has to be reconstructed.
Crop an overlay near the edge
Cropping works when the text sits in a corner and the remaining composition still tells the full story. Check that the crop does not cut off a subject, product feature, or context viewers need.
Remove text from the image with AI
An AI tool can fill the area where an overlay used to be. Try it when the clean source is unavailable and the text covers a background you can inspect, such as a wall, sky, or tabletop. The result is a reconstruction, so repeated patterns, fine edges, faces, and labels may be changed or invented. Save the original and judge the downloaded result at the size you plan to use.
Retouch the area manually
Use a photo editor's healing or clone tool for small letters when you need control over the replacement area. Work in short sections on a copy, sample from nearby texture, and check that repeating shapes or blurred patches do not appear. For critical details hidden by the text, find the clean original instead of guessing.
How to remove text with PerfectifyAI
PerfectifyAI's current text-removal option is labeled Watermark Remover on the upload page. Use it only for an image you own or are authorized to edit.
- Open the PerfectifyAI Watermark Remover.
- Choose a JPG, PNG, or WebP image from your device.
- Select Watermark Remover, then choose Run.
- Enter your email address and complete the human-verification step. If the site recognizes an existing account, follow its sign-in prompt to continue.
- When your edit is ready, open the download link and compare the result with your original.
Keep the source file. A completed edit is not a guarantee that every letter disappeared cleanly or that the background is accurate.
A before-and-after example
The first photo shows a camera icon and timestamp across the lower edge of a scene at the Golden Gate Bridge. The second shows the scene without that overlay. Compare the areas where the marks appeared to judge how well the visible details were preserved. This pair illustrates the result to look for; it does not identify the method used to remove the overlay.
Before: a camera icon and timestamp across the photo.
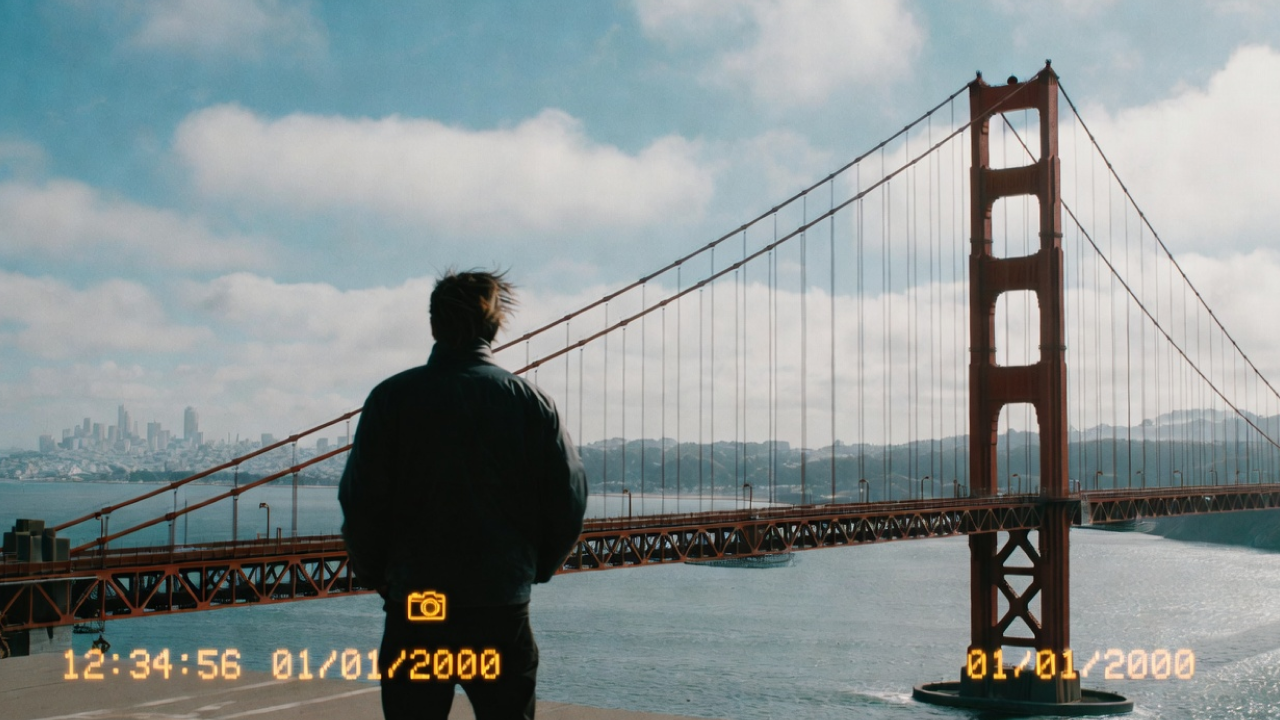
After: the bridge photo without the camera icon or timestamp.
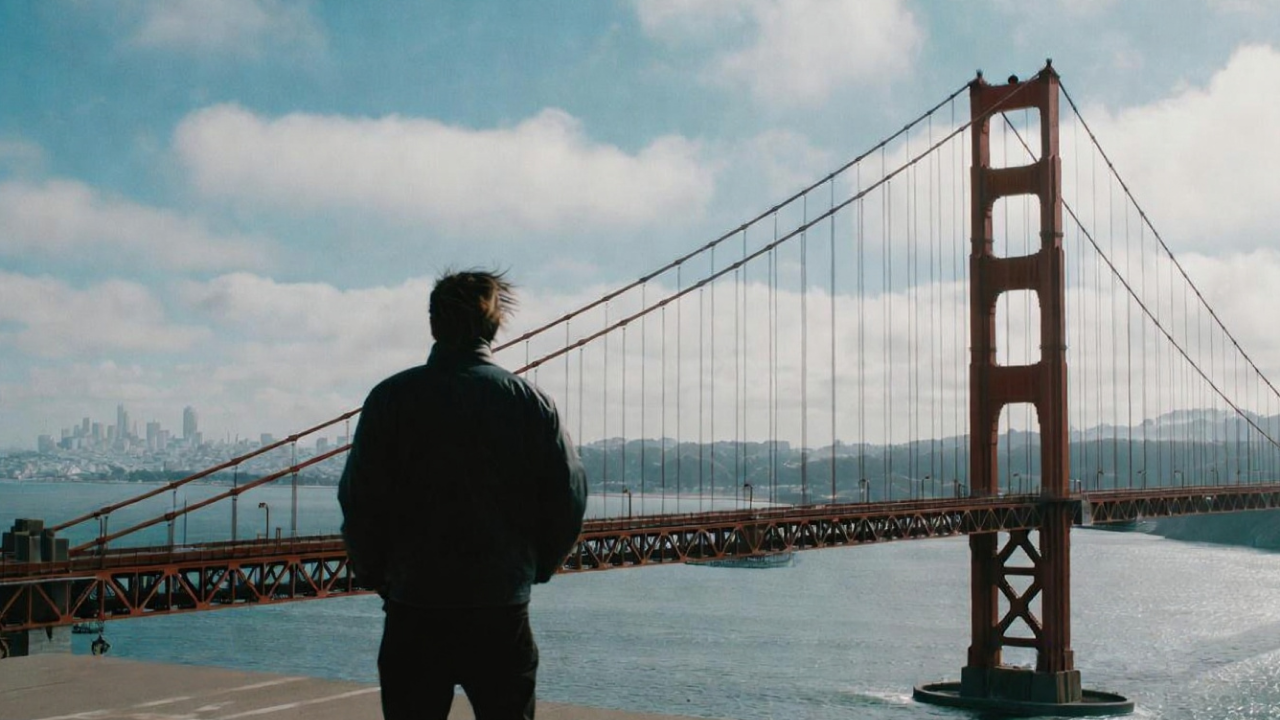
If you only had the flattened “before” image, a removal tool would have to estimate what lay under the icon and timestamp. In this example, inspect the edge of the person's jacket, the roadway, and the water. Those details may look wrong after reconstruction.
How to check an image after removing text
Compare the edited image side by side with your original. First view both at the size where the result will be used, then zoom in around the former letters. Look for:
- Faint letter outlines, halos, or leftover shadows.
- Repeated texture or a smooth patch in a patterned background.
- Bent edges, broken lines, or abrupt changes in color and light.
- Changed faces, product labels, serial numbers, or other meaningful details.
- A result that looks plausible but no longer matches the real subject.
If you find a defect, try the clean source, a different crop, or careful manual retouching. If the hidden area matters for accuracy and you cannot verify it, do not present the edit as an untouched record.
Which option should you try first?
- Have the editable source? Hide the text layer and re-export.
- Text sits near an expendable edge? Crop and check the composition.
- Only have a flattened copy? Try AI removal, then inspect the reconstructed area.
- Need precise control over a small area? Retouch manually on a copy.
- Text covers a face, label, record, or essential detail? Obtain an unmarked original or use a different image.
When you're ready to edit an authorized image, open the PerfectifyAI Watermark Remover and review the finished result before sharing it.